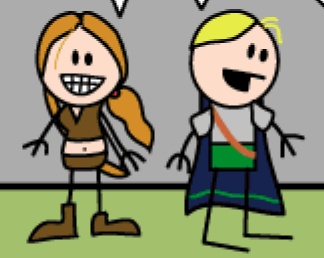
The different body shapes of Haley and Elan
| Hands and eyes and mouth and... | Index | Clothes make the avatar |
Now we've got a basic male avatar, I'll show you how to convert it into the basic female model. In doing so, I'll show you some more of the node tool and why it's so powerful in making your avatars. Even if you're making a male avatar it's good to try this as the skills will come in later when we make the costume.
For some reason people tend to regard the basic plain stick figure as male, so artists need to put in extra features to mark them as female. Some other traditional methods for doing this are eyelashes, lipstick, bows and dresses, but OotS characters don't have eyelashes and lips and not all the women are the type to wear pink ribbons in their hair! Occasonally you could use a particularly female looking hairstyle, but in general there's only two real distinguishing features in Order of the Stick avatars.
The different body shapes of Haley and Elan
The second important difference is that female OotS characters have the eyes and mouth are lower set than with male characters. This is harder to see in the Haley and Elan example posted above because Elan is tilting his head, but it is clearer with a much better comparison between Roy and, uh, "Roylette".
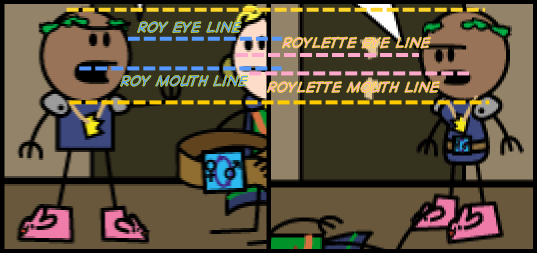
Comparison between Roy and Roylette
As you can see, Roy's eyes are significantly higher than Roylette's just one strip later. Roy's mouth is also slightly higher.
First it's nice if we work with an example in front of our eyes. Find an example of good view of a female character's body shape with some whitespace around it. If you haven't got one, you may need to unlock the concept layer and move things around until you do (remember to lock it again afterwards!). There's a good view of Haley on the left of comic #121, so I'll use that for my work. Then drag the body of our avatar up next to it.
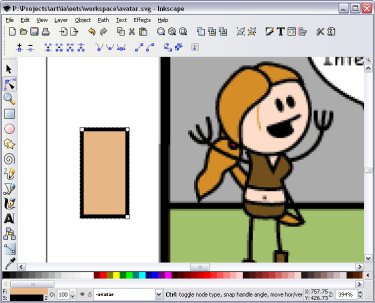
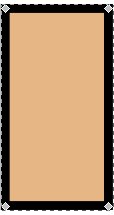
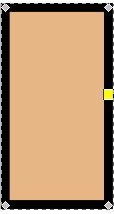
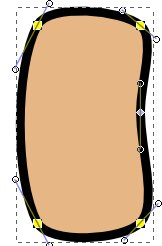
Select the node tool and click the rectangle. You should see white squares and circles around it, like in the image above, instead of the grey nodes we saw in the arms and legs of our avatar. This is because rectangles are a basic shape type in Inkscape and SVG; it's fixed into a rectangle shape. If you move those handles, you can give it rounded corners and change its dimensions, but that's about it.
What we want to do is turn this into a path of nodes just like with the limbs of our avatar. In this case it will be a closed path; one where the nodes start and end at the same point; and it will have a fill colouring it in.
To turn the rectangle into a path, we can select the rectangle, go into the Path menu at the top of the screen, and select Path > Object to Path. You should see your rectangle now with grey diamonds on the corners indicating the nodes.
Inkscape no longer recognises this as a rectangle; it's a path that just happens to be in the shape of a rectangle. You can turn objects into paths, but you cannot turn paths back into objects.
We've now got a closed path with four nodes in the shape of a rectangle. We want to change this into Haley's body shape. To do so though we'll need some more nodes. To show you how to do this, we'll add a node for the sharp change of direction at Haley's bust line. To create a new node, just double click on the path where you want to create it.
You can delete nodes by selecting them and pressing Delete. Curves will average out if you delete a node between them.
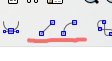
We now need to turn these straight line segments into curves. We could just bend them by dragging the line segments with the node tool, but lets do it without changing them just yet. Select all the nodes by dragging a box around them with the node tool. Then turn them into curves by pressing the "make selected segments curves" button in the node toolbar.
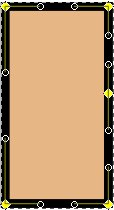
You should end up with node handles for each of the five nodes in the rectangle. These are now technically "curves" even though they look like straight lines.
Now we have our five nodes and line segments as curves, there's one more thing we need to be able do. With the exception of the bust line all the curves around the female body shape are smooth. A smooth curve doesn't have any sharp corners. Curves are naturally smooth everywhere except at the nodes. At the node, they are only smooth if the two node handles form a straight line; one node handle going in the exact opposite of the other. To guarantee a smooth curve, we can turn these nodes into smooth nodes.
A smooth node is shown as a square, and has its two node handles locked to form a straight line. What we currently have a cusp or corner nodes, which can form pointy corners and don't have any restrictions on their node handles.
We want to turn the four corner nodes smooth, but not the fifth node we just created. To select just these four nodes, you can drag the node tool to select all five nodes and then deselect the fifth node by holding Shift and clicking it. Alternatively, you can select each of the four nodes while holding Shift; this will allow you to add nodes to the selection without deselecting the ones you previously have selected.
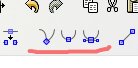
To turn nodes smooth, we can select them and press the "make selected nodes smooth" button in the node toolbar. Alternatively you can use the shortcut key Shift+S. If you want to turn nodes back into corners, then use the "make selected nodes corner" button or use Shift+C.
There is also a third type of node called symmetric nodes, which are smooth nodes where the length of the node handles are fixed to be equal to each other. They're useful for particular types of curves. We don't need them for this shape, however.
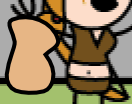
You should end up with a sort of bean shape, like this:
Now that we've got a basic shape ready, we can sculpt in to the same shape as Haley's body. You might want to drag the body over to overlap Haley while you are working, and drag it away occasionally to compare. Don't worry too much about the very top of the shape; if it's under the head, you won't be able to see it.
The trick to sculpting nodes is knowing which types to use and where to place them. Since smooth nodes must have their node handles locked to a straight line, changing one handle will change the other. This can be annoying while you are working, so often it's best to change all the nodes into corner nodes while you sculpt the figure, then change them back when you are done. Remember while a corner node must be used for a sharp corner, it can also act like a smooth node if the node handles are straight. Turn the nodes into smooth when you are done and Inkscape will iron out any little wrinkles they will have.
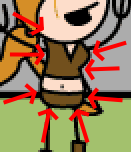
Typically it's best to place nodes where there's a change of direction. There's no real right or wrong place to put the nodes or how many you use as long as you get it looking right. Don't go overboard though - it will be hard to manage and it could look out of place in the simple curves and lines in the OotS world. Here's where I'd place the nodes around Haley's body shape. With the exception of the node at Haley's bust line all of these should be smooth.
You could probably get away with less than these; you could for example just have one instead of two nodes at the hips; but it should be easier to sculpt the nodes at these places.
Go ahead and try to make our bean shape match Haley's body shape with the node tool. Drag the line segment into curves and play around the the node handles. You might want to convert all the nodes to corner nodes before you start, and change them back later. Add and delete nodes as you wish. Note that when you delete nodes Inkscape will try to average out the path between the remaining nodes and this will convert them into corner shapes. You can hold down Control as you delete a node to stop Inkscape from doing the averaging process. Also look out for when you press delete when a line segment is selected instead of a single node; you'll delete both the nodes for the line segment. You may need to use undo a lot during this process.
Once you're done, change all the nodes save the one at the bust line back into smooth nodes and make any minor corrects necessary to get it looking right. You should end up with a close version of Haley's body shape.
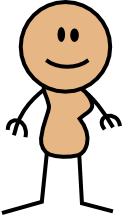
Note: I'll have to admit to forgetting to do this step myself until much later; I knew something was wrong with how my avatar looked but I couldn't put my finger on what it was! Unfortunately I had made a whole bunch of screenshots before catching the mistake, so I've tried to patch things up through the miraclous power of digital editing.

Now we've got a basic female avatar! Plus we've covered how to sculpt shapes with the node tool. Now you've got all the basic knowledge to make whatever you wish; just sculpt it with nodes!
| Continue to Next Page | Back to Top | Order of the Stick is Copyright © Rich Burlew 2003 - 2007 Last updated: 12th December, 2007 by David Shaw |