
| Gender swap | Index | A trip to the hairdresser |
Next we can move onto putting some character into our avatar. She needs clothes for starters.
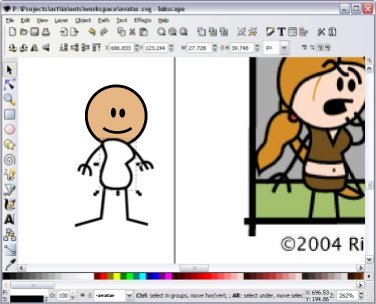
We'll be creating a lot more shapes now we get to the clothes, so I'll be speeding things up. I'll still stop to explain anything that's new but by now I'm assuming you're familiar enough with the basics that you won't need to be walked through every step.
I'll be crafting my avatar as a sort of bandana-wearing swashbuckler with a magic longsword. Hopefully this will cover enough of the basics clothes types that you'll be able to figure out how to make any variants that you wish.
Remember that the best source for how to draw something is in Rich's own comics: there's enough of them out there that something similar to what you are thinking of has been covered.
Also note that OotS is far more about abstraction than detail. The challenge isn't in adding in as much little fine detail as you can, but in figuring out the best combination of shapes and colours that suggest the detail you want. This isn't as easy as it might seem, but it's all part of the fun!
Don't hesitate to drag what you're working with closer to an example so you've got a reference to work with. That's one of the more powerfuil things you can do with computer art tools.
The art in drawing something with shapes and paths is to figure out what components you need to build it. There's no right or wrong way to do this, just whatever works best for you. Often it's a good idea to experiment with different techniques just to see how well they work for you. I'll be explaining exactly what I'll be doing to craft this avatar so you can see my thinking processes.
Off we go!
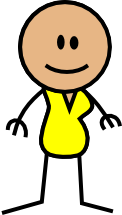
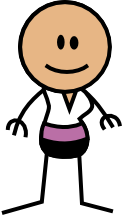
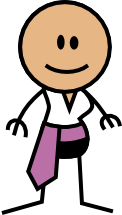
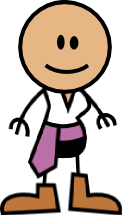
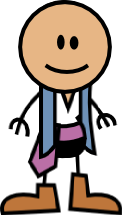
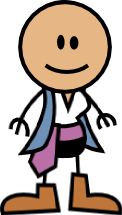
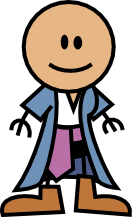
I'll be drawing my swashbuckler with a white shirt similar in style with Haley's top, with black pants and a sash.
Since most of her body will be covered in the shirt, I'll make her torso white to start with.
She now needs a triangle of skin for the neckline of the shirt. I'll be using Haley as a model for this. I'll make a triangle with the pen tool, fill it with skin colour. and then move it on top of the figure.
Make a triangle with the pen tool is very similar to how we made the legs, except this time we need a third line to complete the shape. If you finish a line segment at the same point you started with, the pen tool will stop drawing and Inkscape will create a shape from the lines you drew.

In the OotS world pants are only drawn on the torso; they don't extend to the legs. Once again Haley is a good example to work with. For form-fitting pants I'd like them to have the same contour as the lower part of the body.
The easiest way to make the pants in my view is to make a copy of the entire torso and cut it down to size. To make a copy of the torso, select it and use Control+C to make copy. Then paste in place using Control+Alt+V. This will paste the torso over the top of the original, which is what we want. You'll end up with a torso copy covering all of the avatar:
I'll move it down the ordering until it's just under the triangle for the neckline; this probably doesn't matter but I feel a bit more at ease with things in a sensible order.
Now I'll pick a new colour for the pants so stands out. While I want them to finally be black I'd like something that stands out from the stroke outline of the figure. For now I'll make them bright yellow.
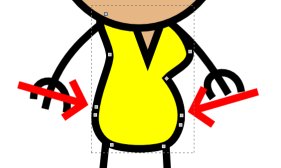
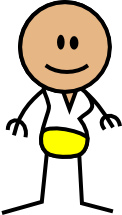
Then I'll delete all the nodes above this point. I'll hold Control when I press delete so Inkscape doesn't change the node handles at the belt line of the pants to compensate: it'll be easier to fix this way.
You'll end up with a figure like this:

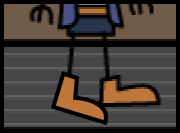
For the boots, I'll use the rectangle method again. It might seem a bit strange to do it this way, as boots aren't particularly rectangular, but I find it's a lot quicker this way myself. An alternative would be to make a boot shape with the pen node, or even use the pencil tool (which I haven't covered yet), but I find adding nodes to be a very efficient way of making simple shapes like that of the boot.
I'm using Elan as the model for my boots. He's got the right sort of boot type for my avatar, and the colour looks like it might work well.
I'll start with a rectangle the same colour as Elan's boot:
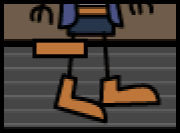
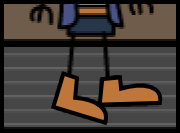
Then convert it to a path and add, delete and move nodes until it's vaguely boot shaped:

Now I can curve the top of the boot to make a nice shape:
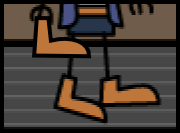
To check how nice a fit it is, I'll drag the boot over the original to compare. You can rotate the boot by using the selection tool and double-clicking on it. The arrows around the edges will turn into curved arrows. Click on one of this to rotate the shape. You can also move the cross to define the centre of rotation around the shape: this is great for things like arms where you might want to rotate around the shoulder joint.
Once it's rotated and in place, I'll check to see whether the boot is roughly the right size as Elan's:
The second boot can be made from a copy of the first. Just copy and paste the first boot, move and rotate it roughly over Elan's other foot, and move the nodes around for a match.
Finally, I'll drag the boots back to the avatar and put them on her feet. I'll remove the old feet off the legs of the avatar because I don't need them anymore: I'll just delete the end node to remove the foot of each leg. Then I'll move a boot onto each foot. I can use the H key to flip one of the boots round so it's the right position.
I used the smaller boot on the left leg (her right) as it makes for a better composition with the sash on that side. I also shrunk the sash a bit so it didn't blend too much into the boot. Finally, don't make the boots too flat against the ground; I think it looks better if they're crooked.
Now I'll give her a jacket similar to that on Elan. Similar to the sash, I'll make two rectangles, turn them into paths, and shape them a bit like Elan's jacket:
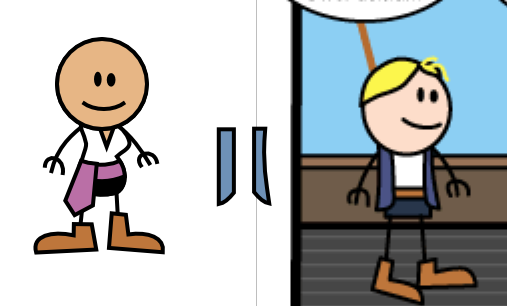
I'll now move them across to the avatar and attempt to put them in the right place. There's enough shapes here now that placing shapes in order gets a bit difficult. You may need to move things up and down the display order, such as the sash.
You might also start have difficult selecting the item you need. You can cycle through items below the one in front if you hold Alt as you click. If you want to move an item out from underneath something, hold Alt as your drag.
The jacket is going to need some work to get it to look right. I'll add a few more nodes to try to give it a more curves and see how that goes:
It looks a bit better, but it doesn't quite seem right to me. It doesn't quite look like a jacket. I'll add in some sleeves to see how that goes.
Sleeves are a bit trickier because you need it to blend in with the rest of the jacket. To do this, you'll need to break the stroke at the point where it joins. The easiest way to do this is to split the path on a rectangle for the sleeve.
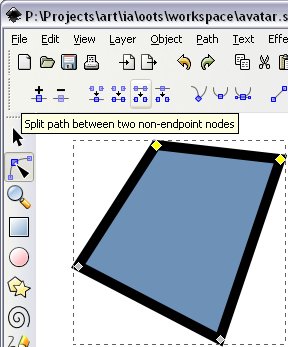
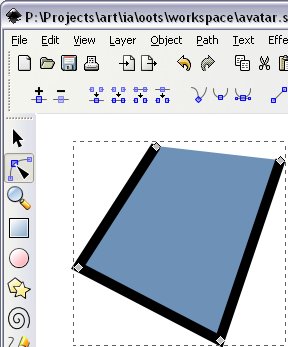
Note that this technique only works for one line segment in the path. If you remove another line segment not on the end, the fill will not colour in a particularly useful way. If you need to do something like this, you may need to have two copies of the shape, one for the fill and one for the stroke. Use the copy and "paste in place" techniques to do this.
Now I'll add sleeves onto the jacket and see how that goes:
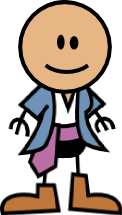
Not too bad - I think it looks better like that. I've moved the part of the jacket behind her figure out in front and given it a curve out front where she also does.
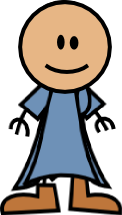
Now as a final test, I'd like to see what it looks like as a longer coat. This will involve a few steps. First, I'll extend the end nodes of the jacket and pull them down, fixing up any problems that occur on the way:
I've played around a bit the nodes there in that last image to make it look okay. I've also moved the sash around a bit so you can see what it is a little clearer.
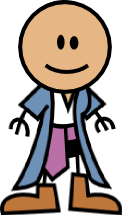
Now we need to put a back to the coat. I'll make this out of a rectangle like with many of the other items of clothing. Just for now I'll make it the same colour as the rest of the coat...
Here's two shots of the back of the coat, one with the back in place and one with it brought to the front so you can see the shape better. The only real important part is the curve at the bottom, since that is all you can see. It curves slightly inward to give it a sense of depth. I experimented around with the curve to see what works best, but it seemed a shallow curve seemed to work better than a deep one like the coat on Captain Scoundrel. My feeling is that the coat is more form fitting and less billowy than the cloaks and coats in OotS (as a personal note: I love the way the cloaks look like they have volume with just a few curves in OotS. It's a very nice touch.)
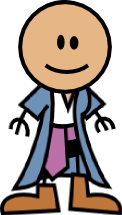
Finally, we'll need to colour the back of the coat a darker shade to indicate it's on the inside.
There! We're done. I'm not sure it's the best use of curves in the coat as that was a bit experimental, but it doesn't look half bad. I think it'll do fine for an avatar.
| Continue to Next Page | Back to Top | Order of the Stick is Copyright © Rich Burlew 2003 - 2007 Last updated: 12th December, 2007 by David Shaw |