| Out on a limb | Index | Gender change |
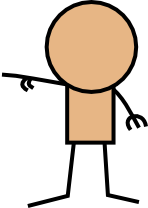
A variant is the pointing finger. For this, you'll need the arm to make the pointing finger, and draw two small line segments curled over to finish the hand.
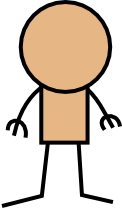
I'll be using normal hands for my avatar, so I'll go with the two fork hands.
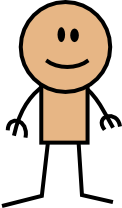
The eyes are probably the most important part of the figure to get right. They're a very distinctive shape in OotS (one eye is always a bit taller than the other), plus they're a key defining feature of what people look at in a face. Spend some time getting the eyes right as it'll really make your avatar look good.
To get good OotS eyes, pick a sample character from one of the comics you've got in the concept layer who is standing straight and zoom all the way in on their eyes until they're huge.
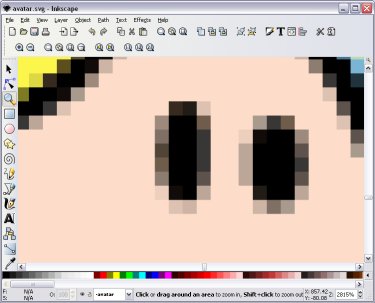
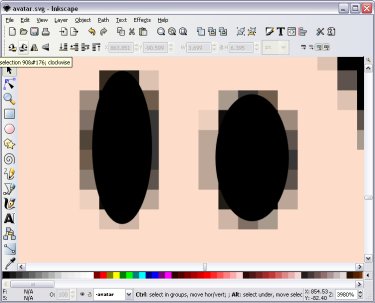
Then draw two black ovals that cover these eyes as well as you can. You'll need to remove the stroke around them so you only have a black fill colour. Make the fill black first, then middle click the stroke colour at the bottom left of inkscape to do so.
Since the eyes are usually very small, they're usually quite pixellated when you zoom in. You'll need to estimate where the ovals should go to cover the pixels around the outside. Typically a dark pixel will have more of the oval on it than a light pixel.
The eyes should be moved around as a group, so it's time to introduce you to Inkscape's group ability. Grouping allows you to group together object so you can move them around as a single unit. It's very useful to group related things together so they act like a single big object.
You can group two or more objects together by selecting them and pressing the shortcut keys Control+G. To ungroup them again use Control+U or Shift+Control+G.
You can put groups inside other groups too. Ungrouping a big group will leave any smaller groups intact. If you want to ungroup everything often you'll need to continually press Shift+Control+G until Inkscape tells you there are no more groups left to ungroup.
For now, we just want to group the two eyes together, so use the selection tool, drag over both eyes and press Control+G. The dotted line with arrows that indicated selection should grow to cover both eyes. Now if you zoom out and move the eyes around, you should see that they move as a single group.
Note that the eyes should level at their bottom, so the dotted line around both eyes in the group should touch the bottom of both eyes. If one eye does not touch the bottom line, you may need to move or resize it. Either ungroup the eyes for the moment, or you can double click on one eye with the selection tool to edit it within the group.
Since the eyes are so important to get right, it's worth doing another check that they're the right size. I like to move the eyes outside the sample face to see they're right. You can move the eyes straight up, down, left or right by holding Control while you move them; they'll snap into one of these positions. Or you can select the eyes and press the arrow keys to move them.
If you need to compare the eyes with other characters, you may need to flip them around. While an object is selected, press the H key to flip them horizontally, and press the V key to flip them vertically. A horizontal flip will switch the eyes around. A vertical flip isn't so useful for the final version of the eyes, but it is useful at the moment when checking they're the right size. I'm going to move my eyes down off Elan's eyes to see if they're about right and flip them vertically to make them "mirror images" of Elan's eyes so I can check they're about right.
Zoom out to the normal view by pressing 1 so you can get a good feel of what the eyes look like at the proper size. You can zoom all the way back in again by pressing 3 while the eyes are selected. If you are trying the mirrored four-eyes look don't forget to vertically flip the eyes back when you're done!
Once you're happy that the eyes look close enough as you can make them, drag them across to the blank head of your avatar and see that they look right. It should look OotS-ish when you use them to make a face.
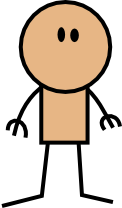
The basic closed mouth is just another line, so it's pretty easy to add. The other mouth types such as toothy grins and speaking mouths involve some more fancy node work, so I'll cover those a bit later on. For now, we'll stick with a curved line smile to complete the face.
Save your work. We've now got a full basic avatar! He might be plain and not be wearing much, but he's a good solid model to base any male character from.
| Continue to Next Page | Back to Top | Order of the Stick is Copyright © Rich Burlew 2003 - 2007 Last updated: 12th December, 2007 by David Shaw |