Back to Inkscape...
| Reference material | Index | It all starts with a circle... |
The first thing to do in Inkscape is to set up the workspace so it's just right for us to make our avatar. For an avatar we don't need to do much preparation, but we do need to set up the layers so we can work with both concept art and our final avatar.
Layers are used in a lot of art tools as a way of splitting the parts of the image into different bits. Exactly how you want it split up your image depends on you and what you are making. Each layer is ordered with respect to each other, so everyone in one layer will be front of everything in another. It's like drawing on pieces of clear plastic with a marker and then laying them on top of each other. In a complex piece of art you might have many, many layers to make things manageable.
You can see some of things you can do with layers in the layer menu at the top of screen. You can also open the Layers Window from here with the bottom options (Layers...), or by using the shortcut Shift+Ctrl+L. Open this up now and have a look at it:
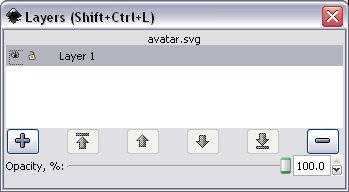
This window is great for working with layers. Some of the things we can do here:
For an Order of the Stick avatar, we won't be needed a scribbling draft layer as the characters aren't too complex. However we will be needing a layer to put the concept images we've got on so we can work with our samples in the background. So we need two layers: one for the concept samples and one for the final avatar.
Currently we have one layer called "Layer 1". This isn't a particuarly good name, so lets rename it to "avatar". Double click on the layer in the layer window and make the change.
Now we need a new layer, so click on the plus button. You'll get a window like this one:
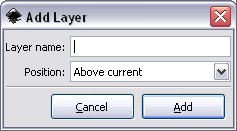
Give the new layer a name like "concept", and click okay to create it.
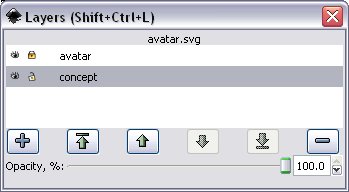
You should now see the Layer window with two layers: "concept" and "avatar". We probably want the avatar layer to be at the front, so move them around using the arrows. (We could have done this in the add layer window by choosing the position of "below current", but it's just as easy to do it this way).
Currently we want to work on the concept layer and not the avatar layer, so lets lock the avatar layer by clicking on the little lock icon.
We should end up with a locked avatar layer and an unlocked concept layer as shown here:
If you've been observant, you might have noticed the following buttons at the bottom of the Inkscape screen:
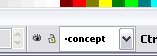
These buttons allow you to change the current layer without going to the layer window. The eye and lock buttons act like they did before: making the layer invisible or visible, and locking or unlocking the current layer. The drop down box shows you which layer you are on and allows you to change which layer you are working on. If you click on the box you should see the avatar layer in there, with square bracket around it to indicate it is locked.
Keep an eye on what layer you are working on so you don't accidently work in a layer you weren't meaning to!
We've made our two layers, so either close the layer window or move it to one side and select the main Inkscape window. Make sure you've got the concept layer open by checking the layer box at the bottom of the screen, and that it's unlocked (no square brackets around the layer name, lock button unlocked) and that it's visible (the layer name is black not grey, eye button is open not shut). Now it's time to get our concept images in!
Even if you've got loads of art samples on the desk in front of you it's nice to have concepts, draft work and visual clues right on the screen while you're working in inkscape. That's why we spent some time looking up OotS comics to fit our avatar style and why we've got a concept layer.
What we're going to do now is put copies of our comics into our Inkscape SVG file so we can look at them while we're working and use them to make sure our art looks like Order of the Stick. When we're done with our avatar we'll hide the layer with the eye button in the layer window.
Note that Inkscape doesn't actually put copies of the files within our SVG file. All it does is store the file reference. You'll have to make sure that the concept art you want to use is saved somewhere on your hard disk. Note for the future that if you need to move your entire workspace you'll need to make sure you copy everything across. This is a good reason for keeping everything in its own directory; it makes the move much easier.
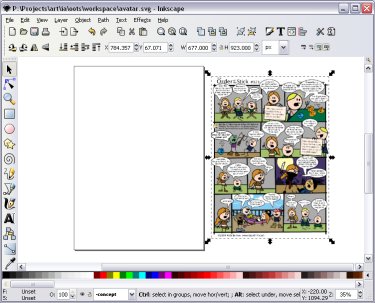
We're going to import each comic into the concept layer. You can import through the File menu, under File > Import, or by using the shortcut Crtl+I. You'll then open a file dialog window to help you choose the file. Find one of the comics and import in it. I'm going to start with strip #121.
 If the image appears in an odd spot, you can move it to a good position.
Use the select and transform tool by pressing the arrow button on the left side of Inkscape,
or by pressing the shortcut key F1 so you can select and drag it around.
Don't click on the arrows that appear when the comic is selected as these will resize the comic; we'd like to keep it the same size.
If the image appears in an odd spot, you can move it to a good position.
Use the select and transform tool by pressing the arrow button on the left side of Inkscape,
or by pressing the shortcut key F1 so you can select and drag it around.
Don't click on the arrows that appear when the comic is selected as these will resize the comic; we'd like to keep it the same size.
I'll drag the comic over to the right of the page shown in the screen. I'll use the space within the page to make the avatar itself, and use the space outside for the reference material.
Now it might be a good time to try out the zoom functions so you can see the detail in the comic.
 There is a zoom button in the left of the Inkscape that you can use with the shortcut key F3.
Clicking with the zoom will zoom in, holding shift and clicking will zoom out.
Dragging will allow you to zoom to the area you drag.
There is a zoom button in the left of the Inkscape that you can use with the shortcut key F3.
Clicking with the zoom will zoom in, holding shift and clicking will zoom out.
Dragging will allow you to zoom to the area you drag.
While the zoom tool is nice, I usually find it much faster to use the keyboard shortcut keys or the mouse. The keyboard keys are plus or equals for zooming in, and minus for zooming out. Alternatively, you can hold Control and use the mouse wheel for zooming.
(If you don't hold Control, the mouse wheel will move the viewable area up and down. If you hold Shift, the mouse wheel will move the viewable area left and right.)
Other great zoom keys are the number keys. 1 will zoom to 100% view, 2 will zoom to 50%. 3 is a really useful zoom as it will zoom to the currently selected object. 4 will zoom to include everything you've drawn. 5 will zoom to fit the page to your screen, and 6 will fit the width of the page across the screen. Finally, the backward apostrophe and tilde key (that one to the left of the numbers on most keyboards) will cycle through all the zooms you've gone through; press the key on its own to go back to the last zoom, press shift and the key to go forward.
Learning how to zoom in to get the best view of what you're doing is vital, so play around with the zoom for a bit if you like.
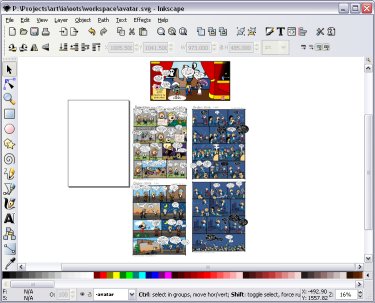
Once you've finished zooming, import in the rest of the comics and reference material (Import under the File menu, Ctrl+I) and lay them out how you wish.
Since we're done with all the reference material, lock the concept layer by clicking the lock button at the bottom of the Inkscape screen. Then click on the layer drop-down box and select the avatar layer, making it the active layer. Since the avatar layer is locked, you'll also need to click on the lock to unlock it, otherwise we won't be able to draw on it.
Here's what my window looks like after I've done with my concept layer and I press 4 to zoom to include everything in the document.
Now would be a very good time to save our file. Press Ctrl+S and quicksave. We're now finally ready to start creating the avatar!
| Continue to Next Page | Back to Top | Order of the Stick is Copyright © Rich Burlew 2003 - 2007 Last updated: 12th December, 2007 by David Shaw |