
| Layers upon layers | Index | Making the body |
By now you should have all your reference material locked away in your concept layer, and a ready, open unlocked avatar layer just waiting for you to draw something on it. It's now time to start crafting our avatar! We'll start by creating a basic head, male body and limbs before moving in to put in the details.
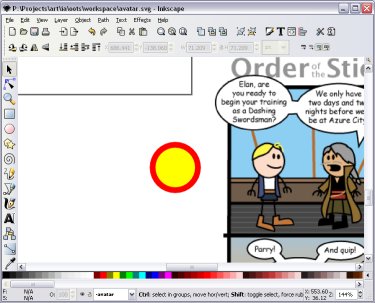
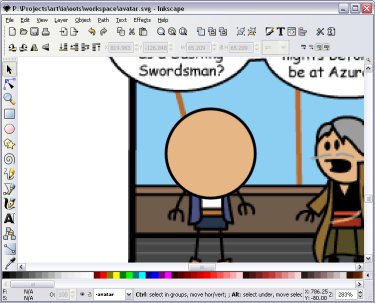
Zoom in and move the view so you can see one of the heads of a character, but also have some white space to the side to work in. It doesn't particularly matter which one as they all tend to have the same head shape anyway. I'll zoom in to the first panel in OotS #391 where Captain Scoundrel is talking to Elan:
 Humanoid characters in OotS tend to have a circle for a head (unless they're skeletal like Xykon).
Select the circle tool by clicking on the button on the left of Inkscape, or use the shortcut key F5.
Humanoid characters in OotS tend to have a circle for a head (unless they're skeletal like Xykon).
Select the circle tool by clicking on the button on the left of Inkscape, or use the shortcut key F5.
We want to draw a circle, but this tool can also draw ovals and arcs. We need to make sure that the shape we draw is a circle. To do so, we must hold down Control as we drag. This forces the tool to draw "integral ovals", which are ovals where the values of the height verses width can be written as an integer (like twice as wide as high, three units high to two units wide and so on). For a circle, we want it to be just as high as wide, so we drag roughly diagonally. Try to make a circle roughly the same size as Elan's (or whoever's) head. Don't worry if it's not exact at this point, but do make sure it's a circle.
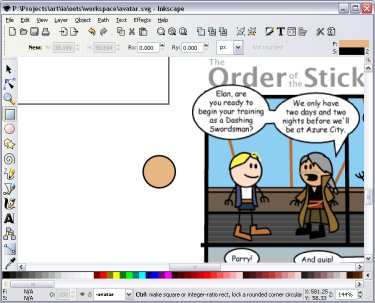
Here's my circle. You've probably got different colours, and I've deliberately drawn it a little bit too large so you can see it better when I need to make adjustments in the next stage.
We now need to make sure that the circle looks exactly like an OotS head. This involves both making sure that both the circle and the stroke are the right size and the right colour. The stroke is the name Inkscape gives to the outline around the edge of shapes. The inside of the shape is called the fill.
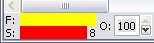
You can see the details of current fill and stroke in the bottom left hand corner of the screen when an object is selected, which shows the colour of both the fill and the stroke, the stroke width (next to the stroke colour), and the opacity of the object (the opposite of transparent; 0 is completely see-through, 100 is totally solid).
There are a number of ways we can change the colour of the fill and stroke. One of the simplest is to click on the colour you want in the palette running across the bottom of the screen. Just select the object you want to change and click on the colour to change the fill colour. Hold down Shift and click to change the stroke.
 A second way to change the colour is using the eyedropper tool on the left of Inkscape at the bottom of the buttons
(shortcut key: F7).
Again, when the object is selected click to change the fill colour, shift+click to change the stroke.
You can also hold and drag to select an entire region to pick the average of the colours there.
A second way to change the colour is using the eyedropper tool on the left of Inkscape at the bottom of the buttons
(shortcut key: F7).
Again, when the object is selected click to change the fill colour, shift+click to change the stroke.
You can also hold and drag to select an entire region to pick the average of the colours there.
Finally you can edit the colours these in the Fill and Stroke window. The Fill and Stroke window is one of the most useful in Inkscape, as you'll be doing a lot of tweaking in here. You can open the Fill and Stroke window by using the shortcut keys Shift+Control+F, or by clicking on the item you wish to change in the bottom left corner of the screen (for example, the stroke colour to change the stroke).
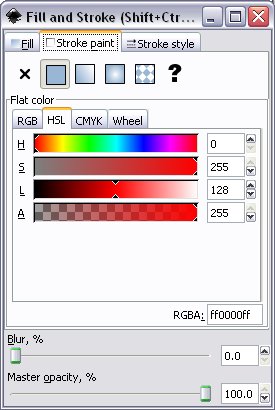
In the Fill and Stroke window you can change the colours using the sliders or play around with blur and opacity. There's a lot of things you can do in here with colour that you can find out by playing around. For now close the Fill and Stroke window and select the circle so we can use some of the other methods.
What we want to do is change the colour of the circle fill to a skin tone and the outline stroke line to black. We can easily change the stroke by selecting the circle and shift+clicking on black in the palette (hold shift and click). If you've scrolled the palette black can be found all the way to the left.
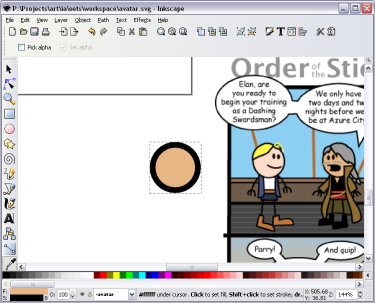
The choice of skin tone depends on what you'd like it to be. I'd like a slightly tanned colour for my Bandana Swashbuckler, so the skin tone of Captain Scoundrel will do. I'll use the eyedropper tool and click on Captain Scoundrel's skin to get the right colour. You might get something slightly off if you click near the edge, so you might need a few clicks to get it. Alternatively you can select something you like from the palette or mix your own using the Fill and Stroke window.
Now that the circle looks a bit like a head, we need to adjust it so it's the right size for both the circle and the stroke. A good way to do this is to drag the circle across is to use the selection tool and drag the circle across to cover one of the heads and try make it exact. Go ahead and drag the circle to roughly cover Elan's head.
Once the circle is in place, we need to change the stroke size so it matches that of the original. To do this, open the Fill and Stroke window and go to the Stroke Style tab (either Shift+Control+F or click on the number next to the stroke colour in the bottom left corner of Inkscape).
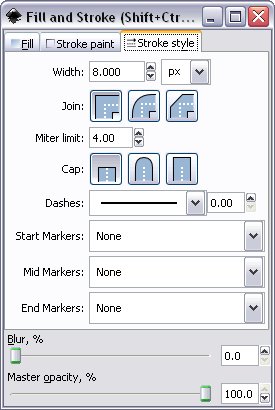
From here you can change what the stroke line looks like - from its width to dashed lines or arrowheads at the end of lines.
At the moment we are interested in just changing the size of the stroke line to match that of the comic strip. That's the top option - the width of the stroke. Play with the values until you get the stroke looking roughly the same size as that as in the original. You may need to zoom in close to the stroke line to see it clearer, and zoom way out to see the whole thing in the right dimensions. Personally, I find a size of about 2px is about right for me, plus it's an easy number to remember if you need to type it in again later.
Now we need to resize the circle. But we don't want to resize the stroke as well - that would throw out our measurements! Inkscape can do one of two things with the stroke when we resize. It can rescale the stroke with the entire shape, making it look like the whole shape is getting bigger or smaller - stroke and all. Or it can keep the stroke at the same amount. We want the latter in this case.
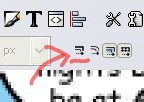
Make sure the stroke scaling button is OFF
Once that's done, we can resize the circle by selecting it, holding the mouse on one of the arrows around the edges, and dragging it to the right shape - but we need to make sure it remains a cicle and doesn't skew out of shape! To do so, hold Control while you drag. Holding Control keeps the shape that you're changing in the same proportions as it was to begin with; all you are changing is size.
You can also hold Shift while you drag as well to resize the shape from the centre rather than from the opposite corner. If you hold Control and Shift while dragging, you can resize from the centre while keeping it a circle.
Go ahead and resize the circle to be roughly the same size as Elan's head. You might need to zoom in and out to make sure it's perfect, or go back and change the stroke width if doesn't look right. You may also need to move it around a little to be exactly over Elan.
Once you've got it looking just right, drag it around to compare against other heads just to make sure. Most of them are the same size. Then drag it back into the whitespace when you're finished.
Press Control+S to quicksave, and we're done. We can move onto the basic male body!
| Continue to Next Page | Back to Top | Order of the Stick is Copyright © Rich Burlew 2003 - 2007 Last updated: 12th December, 2007 by David Shaw |